How to Compress Images for the Web
Site load speed is especially important to Google and other search engines, so you should be doing everything you can to keep your site moving at a brisk pace. Compressing your images to a reasonable file size is a big part of this.
That’s exactly what we’re going to go over in this tutorial: how to compress images for your site before uploading them, how to compress them if they’re already on your site, and the best file types to use for your website.
What Is the Best Image File Type for Websites?
We like to keep it simple with our file types, so we recommend sticking with the basics – JPG/JPEG and PNG.
JPG/JPEG
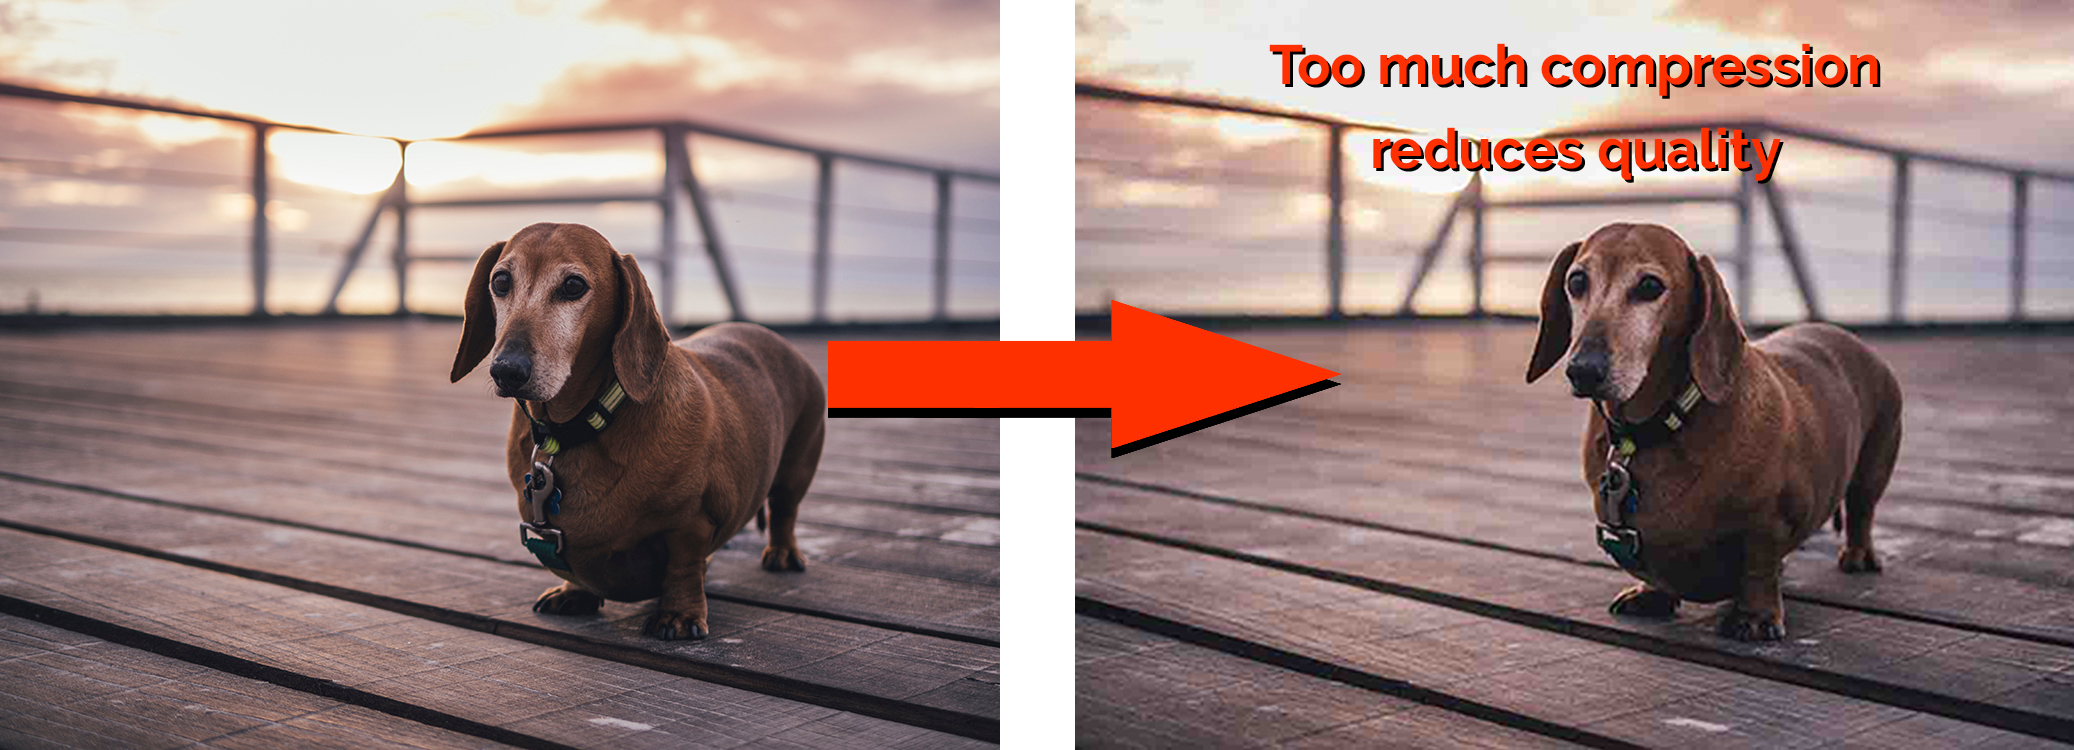
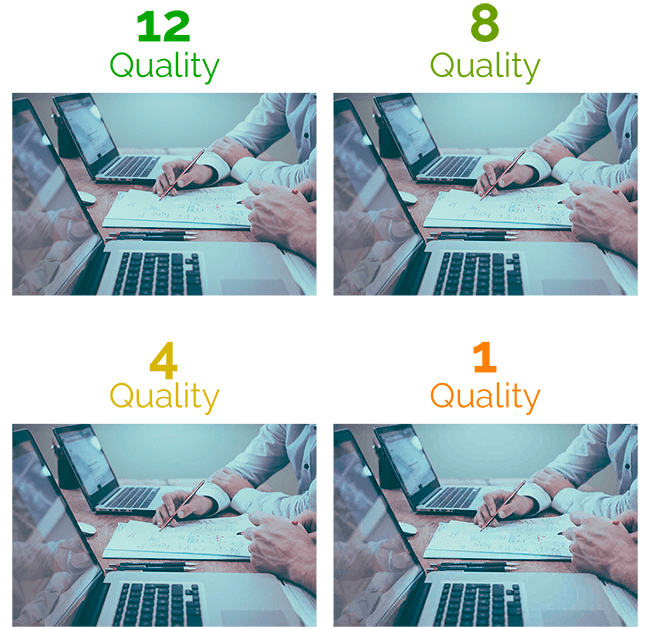
JPG (Joint Photographic Experts Group) is the most commonly used image file type in the world. It works well for photographs because it can easily support millions of colors in a small, compact file size. Be careful, though, because too much compression of a JPG over and over again can lead to less-than-attractive, grainy photos.
This should be your go-to file type unless your image needs transparency, is an icon or logo, would need the colors changed in the future, or is animated in some fashion.
PNG
A PNG (Portable Network Graphics) is the transparency file type. If your image has a built-in drop shadow, transparent background, or any other form of transparency, it’s going to be your best bet. The file sizes are typically larger for the better functionality, but nothing that should hold you back from uploading your image to the web.
We also recommend that your logos and icons be saved in PNG format so that they can be easily edited in Photoshop or Illustrator later on.
![]()
GIF
A GIF (Graphics Interchange Format) can be used for still images or animated graphics. We recommend only using GIF format for animated graphics, but the file size can get a bit out-of-control for longer animations.
How Image File Size Affects SEO
When you visit a site for the first time, your browser has to load all of the images and content on the page to show you. However, loading the images in this way isn’t as easy as it sounds.
Instead, the browser has to find the image file, check the size that it’s going to be displayed on your specific screen, and size it down to that size. The larger the size of the original image, the longer it takes for the browser to do this.
The Importance of Page Load Speed
Without getting too in-the-weeds about why load speed is important, here’s a quote directly from a Google employee regarding the topic.
“2 seconds is the threshold for ecommerce website acceptability. At Google, we aim for under a half second.”
Maile Ohye, from Google
Neil Patel goes more in-depth on this topic on one of his blog posts.
How to Compress Images For the Web
In an ideal world, you’ll be compressing your images before uploading them to your site. However, this usually isn’t the case, so we’re going to discuss ways to compress images before and after they’ve been uploaded.
Compressing Images Before Uploading
If you have an image that’s ready to go live on your site, there’s one question that you should ask yourself: How big is this image going to be on my web page?
If it’s only taking up half of the page, it shouldn’t be more than maybe 1000px wide. If it’s an icon in a row of 5 other icons, it should be even smaller.
The goal is to guess the final size of the image as closely as possible so that you can make your image that size before uploading it. This puts less strain on the web page while loading for users, increasing your load time, and subsequently increasing your conversions.
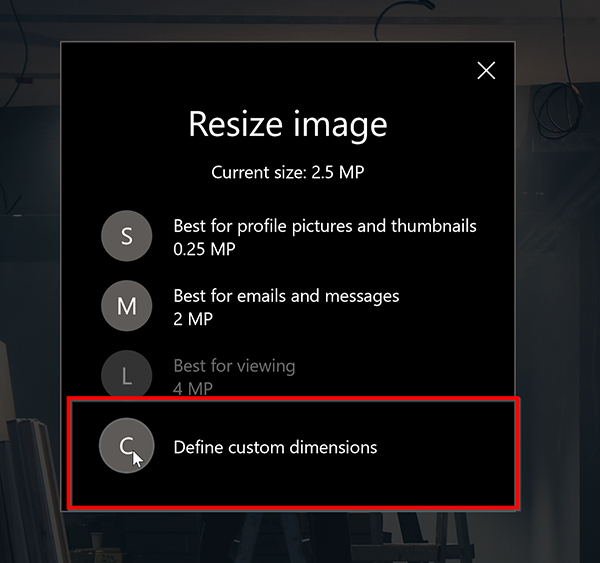
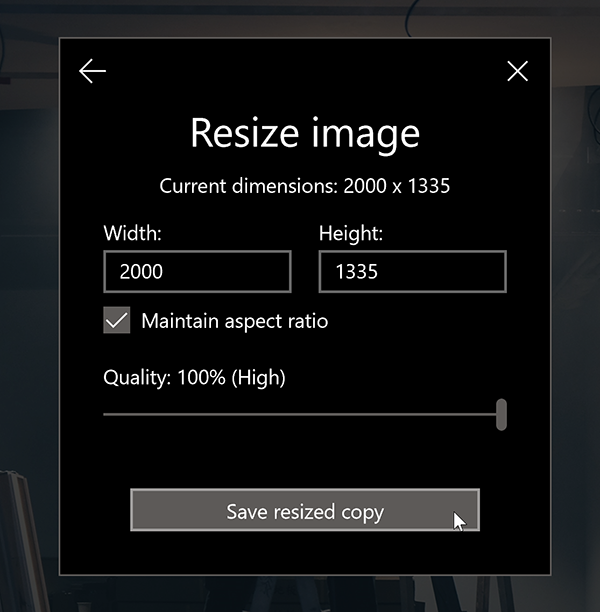
How to resize images in the Windows Photos App
Step One: Select the three dots icon in the top right of the screen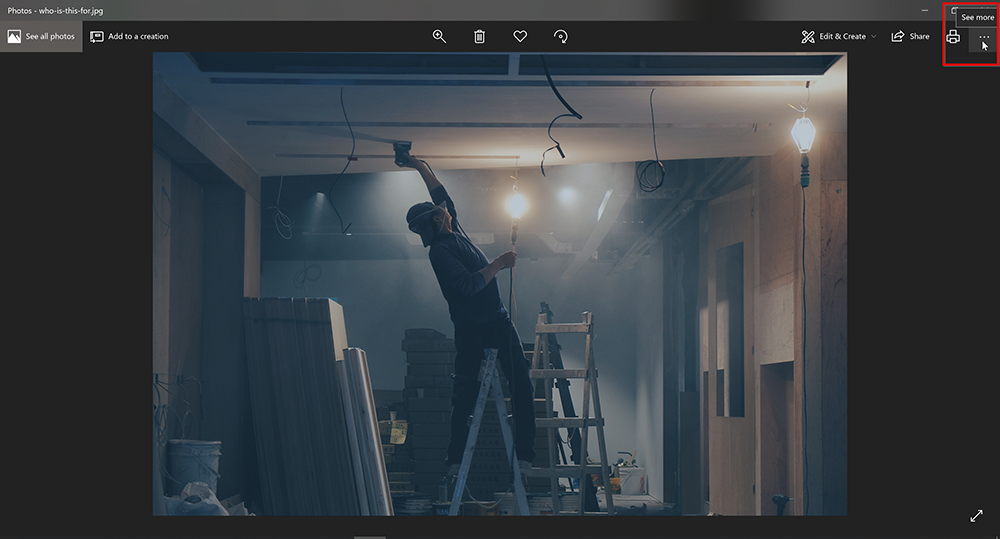

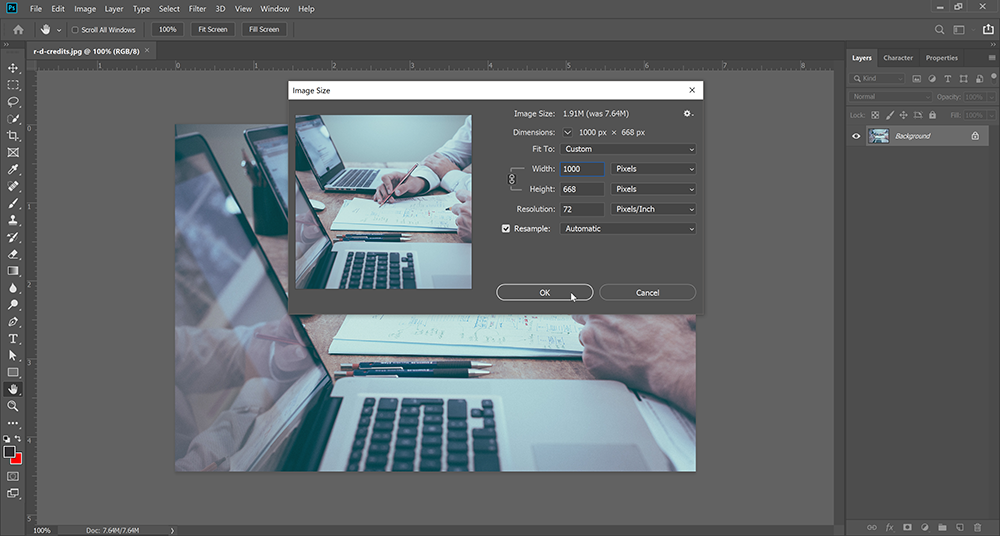
How to resize images in Photoshop
Step One: Press CTRL + SHIFT + I or select Image > Image Size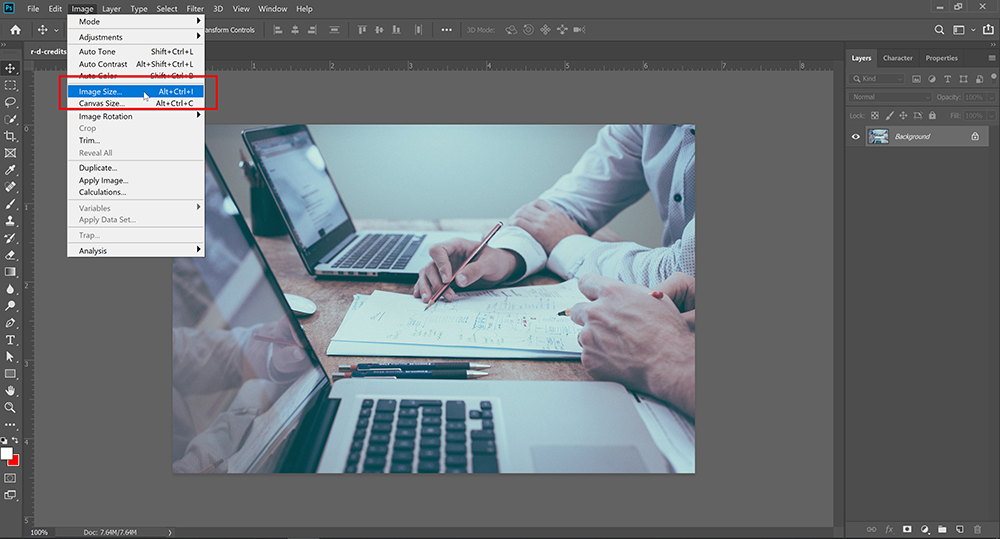
Compressing Images That are Already on Your Site
Looking at all of the images already on your site and thinking about compressing all of them is an extremely daunting task. Luckily, there are a few tools that are able to help you out with this seemingly difficult task.

Cloudinary
We highly recommend checking out the free tool Cloudinary to optimize your pages that already have a lot of unoptimized images on them. Here’s how it works.
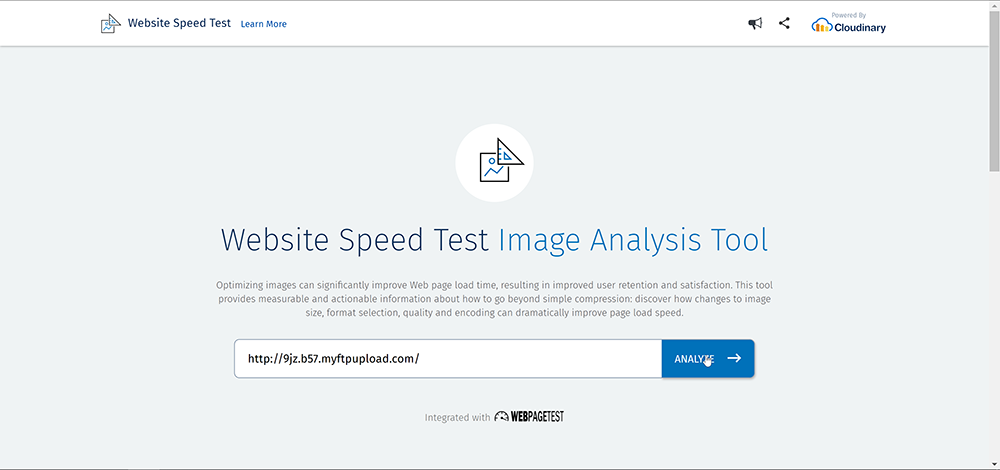
Step One: Copy and paste your page’s URL into the text box and press Analyze
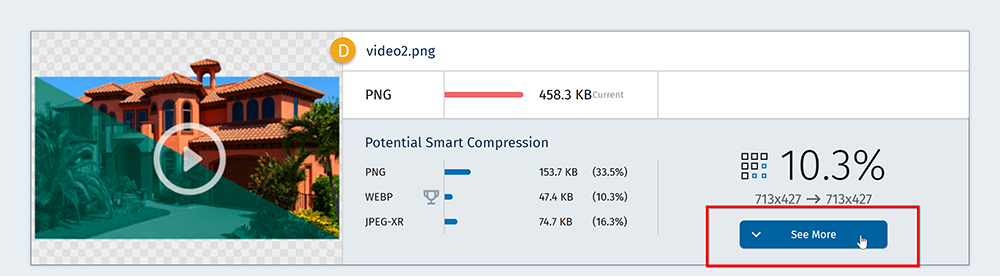
Step Two: It will analyze all of the images (background images too) on the page and create smaller, more optimized file sizes. Click on See more.
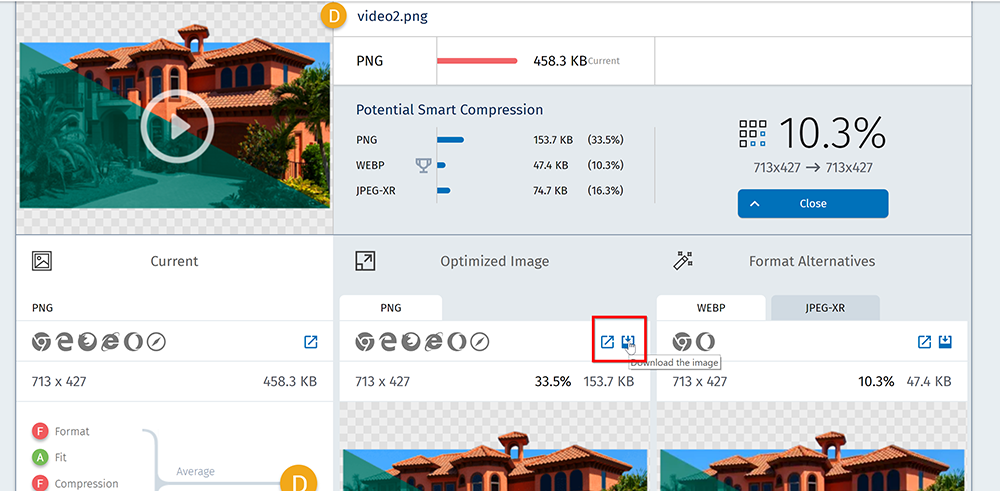
Step Three: Select the file type of your choice and click on the Download icon. It will open the image in another tab where you can right click and save the image.
Getting Start with Image Compression with an Existing Site
If you’re reading this, you’re probably already suffering from slow site speed. If that’s the case, then we recommend starting with using Cloudinary’s free image compressing tool. Focus on your website pages that get the most traffic, and then use Google PageSpeed Insights to test your website’s improved load speed.