How to Install Google Analytics
Virtually every webmaster agrees that Google Analytics is a must, especially considering that the standard version is free. While a more robust, premium version does exist, Google Analytics 360, I’m going to focus on the standard, free Google Analytics for this tutorial.
So, now that your mind is made up to use this extremely useful, free service, let’s dive into how to install it on your website.
This will be an invaluable tool as you improve your site and implement SEO best practices. But first, we need to to install it on your website. Here’s the easy three-step process:
Setting Up Google Analytics in Three Steps
Step 1: Signing Up
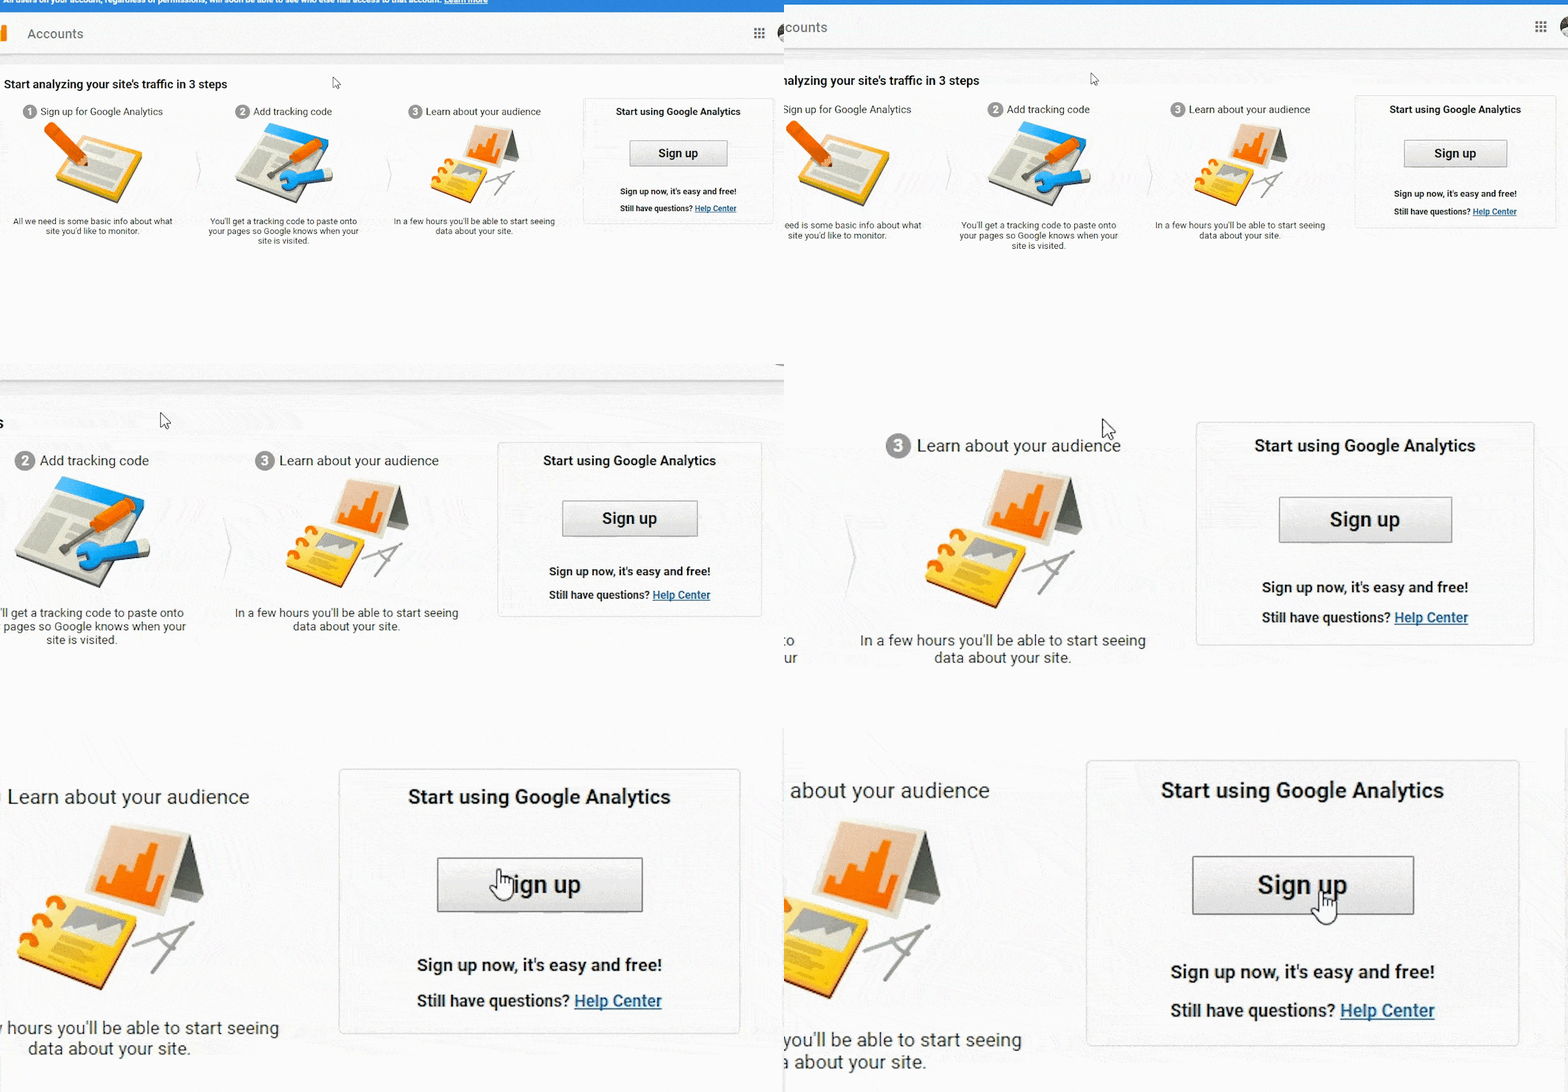
Head over to the Google Analytics Home Page and click the green Sign Up For Free button in the top right of the page.
Click the grey Sign up button on the right side of the screen.
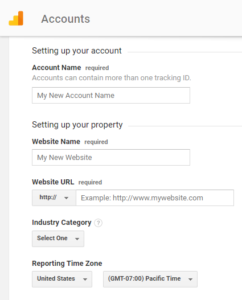
Fill out the form on this page including your Account Name, Website Name, Website URL, Industry Category, and Reporting Time Zone.
I recommend leaving all of the Data Sharing Setting checked.
Using WordPress and want to skip coding? Click here for an alternate method.
Step 2: Installing the Code
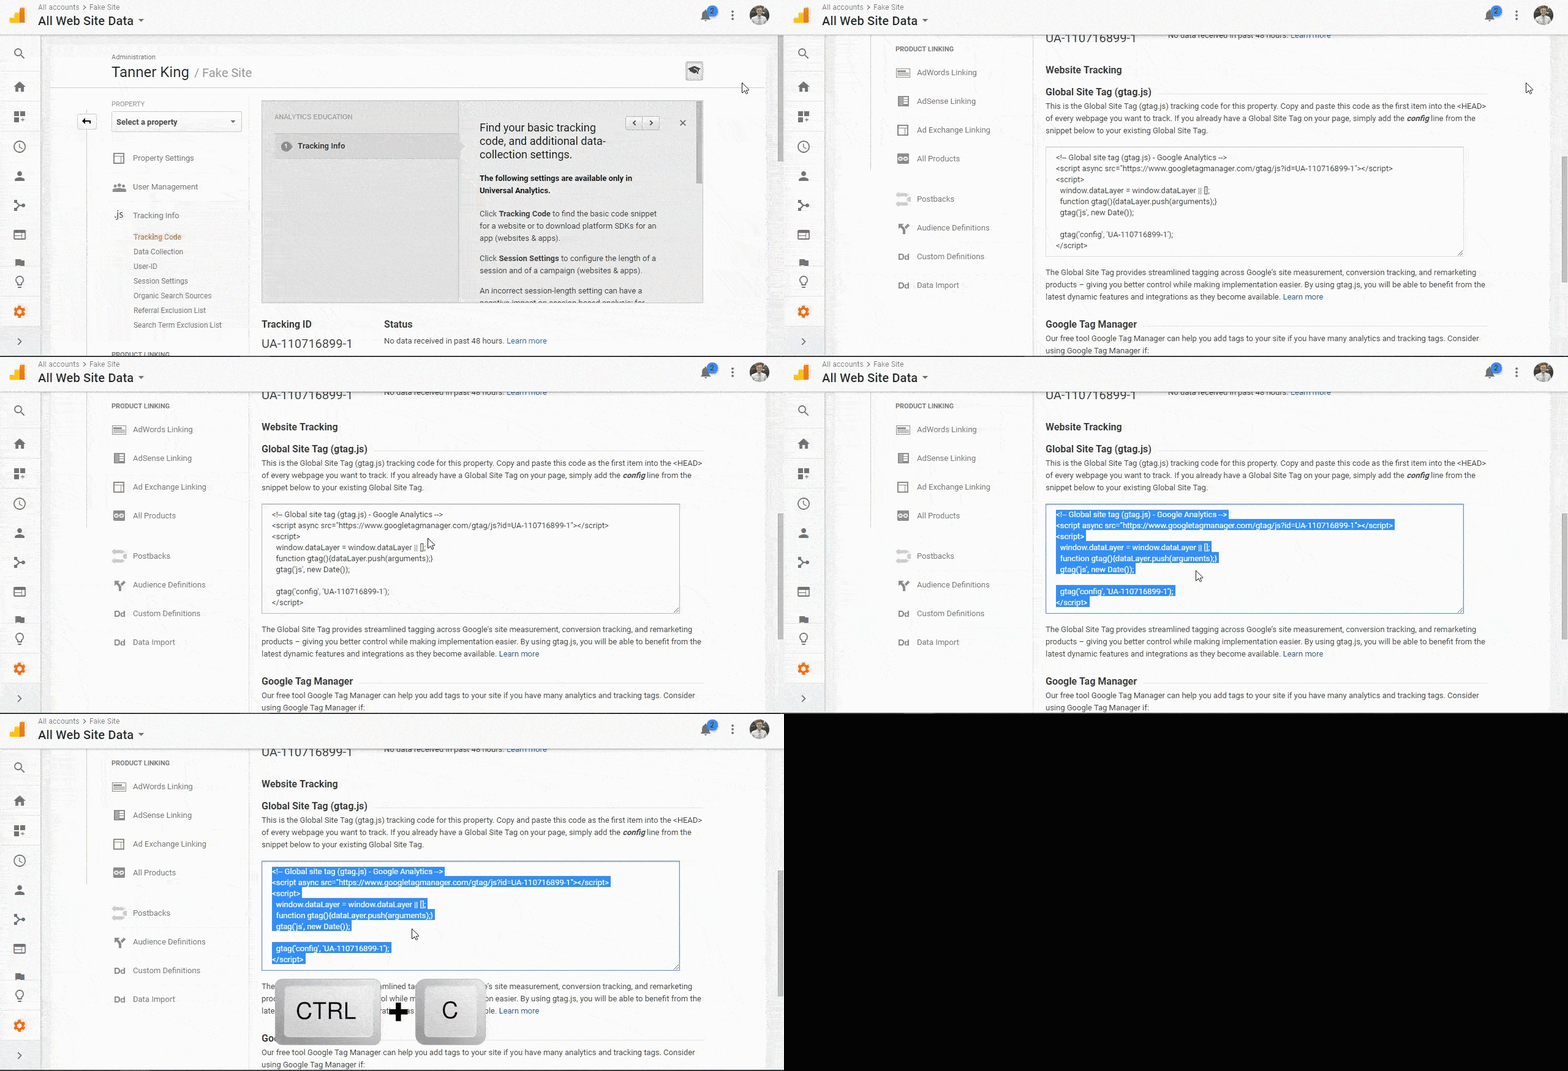
Scroll down the page until you see the Website Tracking section and copy it.
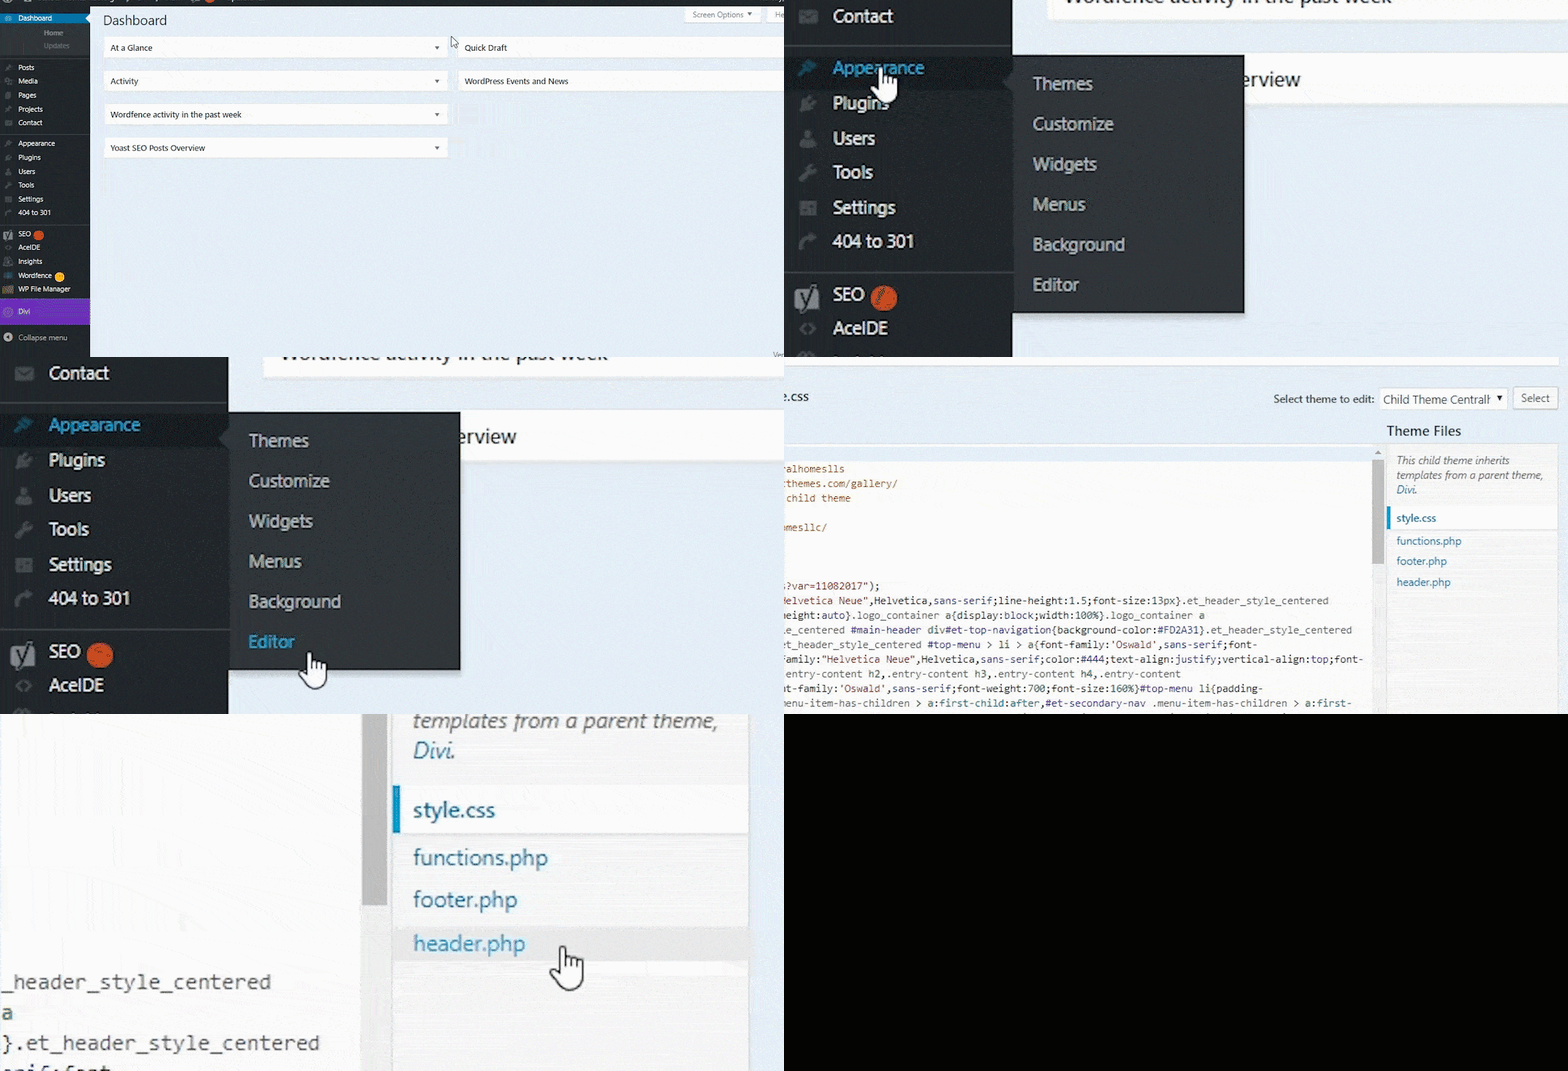
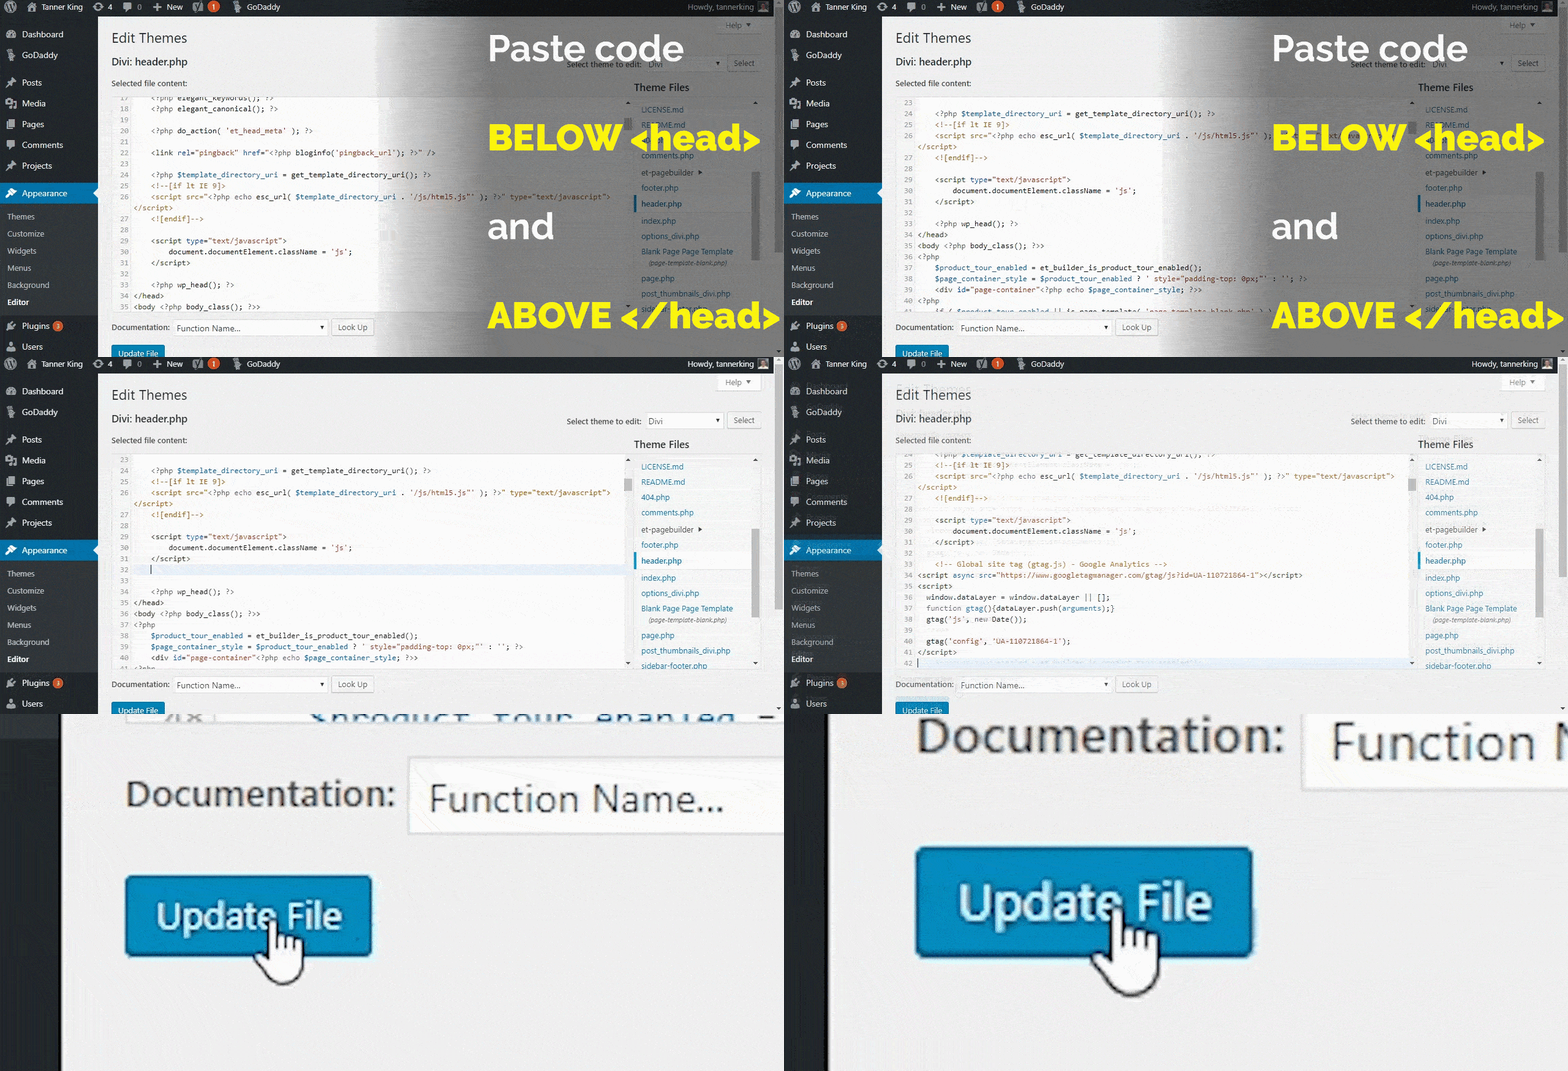
Head to the backend of your WordPress website through Appearance > Editor > header.php.
Paste the meta tag in between the <head></head>.
Click the blue Update File button.
Installing Google Analytics on WordPress Without Code
If you’re using WordPress, there’s a way to bypass Step 2. Many WordPress themes include a field where you can install Google Analytics without editing any code. If your theme doesn’t have this option, consider checking out these three plugins that should help you install Google Analytics code:
Google Analytics for WordPress by MonsterInsights
Google Analytics Dashboard for WordPress
Step 3: Setting up a Goal
For the purpose of this tutorial, we’ll be using Form Submission as our goal.
Unfortunately, Form Submission isn’t a preset goal option on Analytics. Since we can’t just make the actual submit button our goal, we’re going to get creative by using a thank you page.
Create a thank you page that the user is redirected to after submitting a form on your website. With this setup, anyone that submits the form will end up on the thank you page, allowing us to make visiting the thank you page our goal. Ensure that the thank you page isn’t linked to from any other location so that your results are accurate. If you have multiple form submissions that you’d like to track, create multiple thank you pages to track the performance individually.
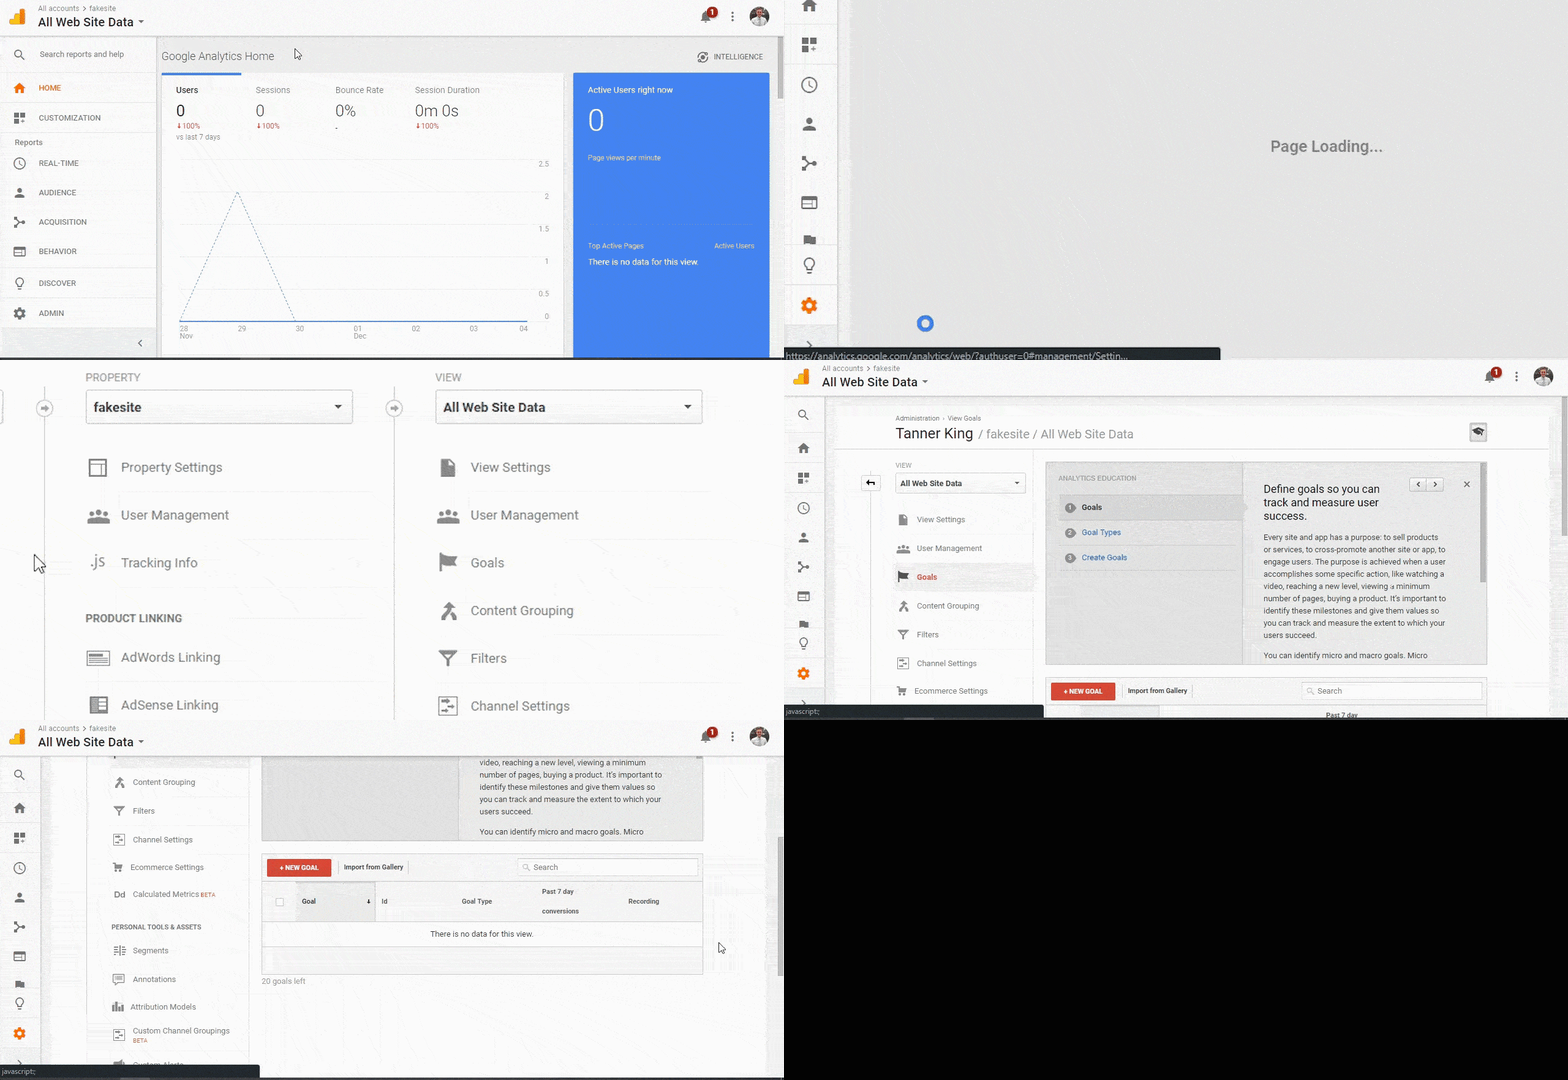
Once the thank you page and redirect are complete, go to the home page of your Google Analytics.
Click the Admin button, then the Goals button found in the middle of the third column. Finally, click the red New Goal button.
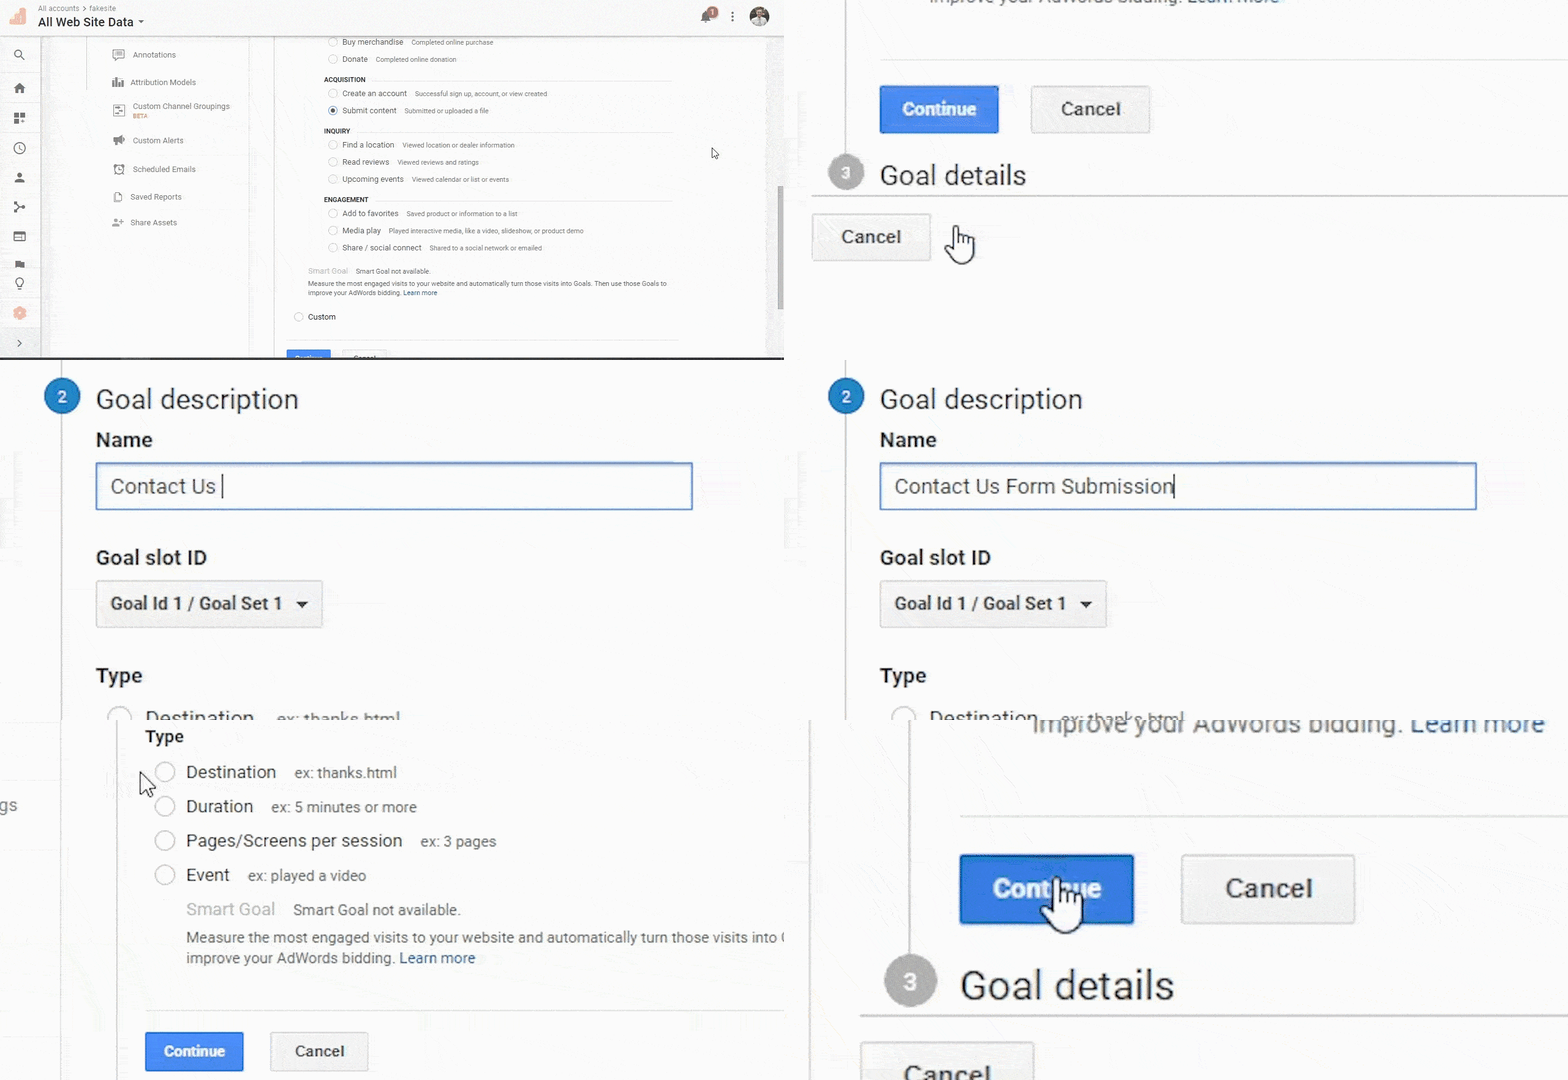
Under Goal Setup, select Custom and hit the blue Continue button.
Now it’s time to name your goal. Try to make the name as descriptive as possible so it can easily be identified.
For example, you shouldn’t name it Form Submission if you have more than one form on your site. Instead, make it more specific, such as Contact Us Form Submissions.
You can leave the Goal ID untouched and choose Destination for the goal type.
Click the blue Continue button.
Select Begins with under Destination and enter just the path, such as /thank-you. There’s no need to include your root domain (alchemymarketing.com.
This method will prevent the conversion not being tracked if your URL does something weird like https://alchemymarketing.com/thank-you/?=XXXXXXX.
Click the blue Save button.
That’s it! You can now track your goals under Admin > Goals right under the red New Goals button.
Verify that the Code is Installed
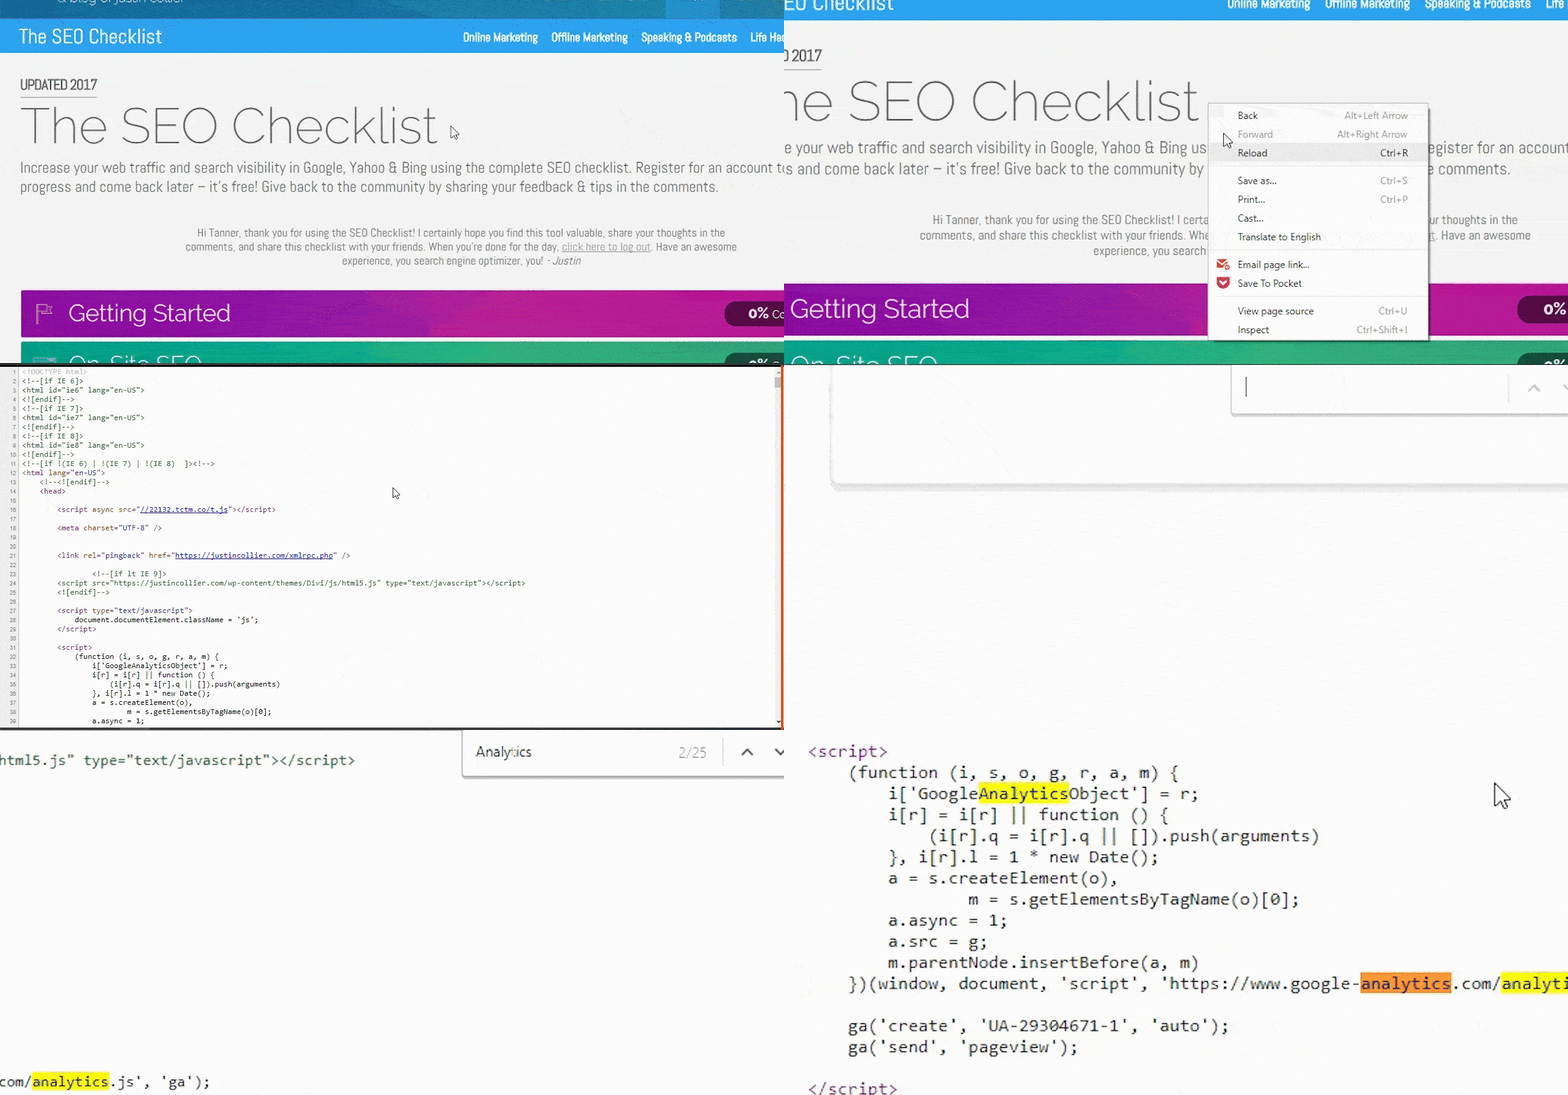
To ensure that this process worked, go to whichever webpage you would like to check, right-click, and choose View page source. The webpage’s code should open in a new tab.
Press CTRL+F, or COMMAND+F on a Mac, and type “Analytics” into the search bar.
If you see the tracking code that you just submitted, you’ve done it correctly.
Give yourself a pat on the back – you deserve it.

